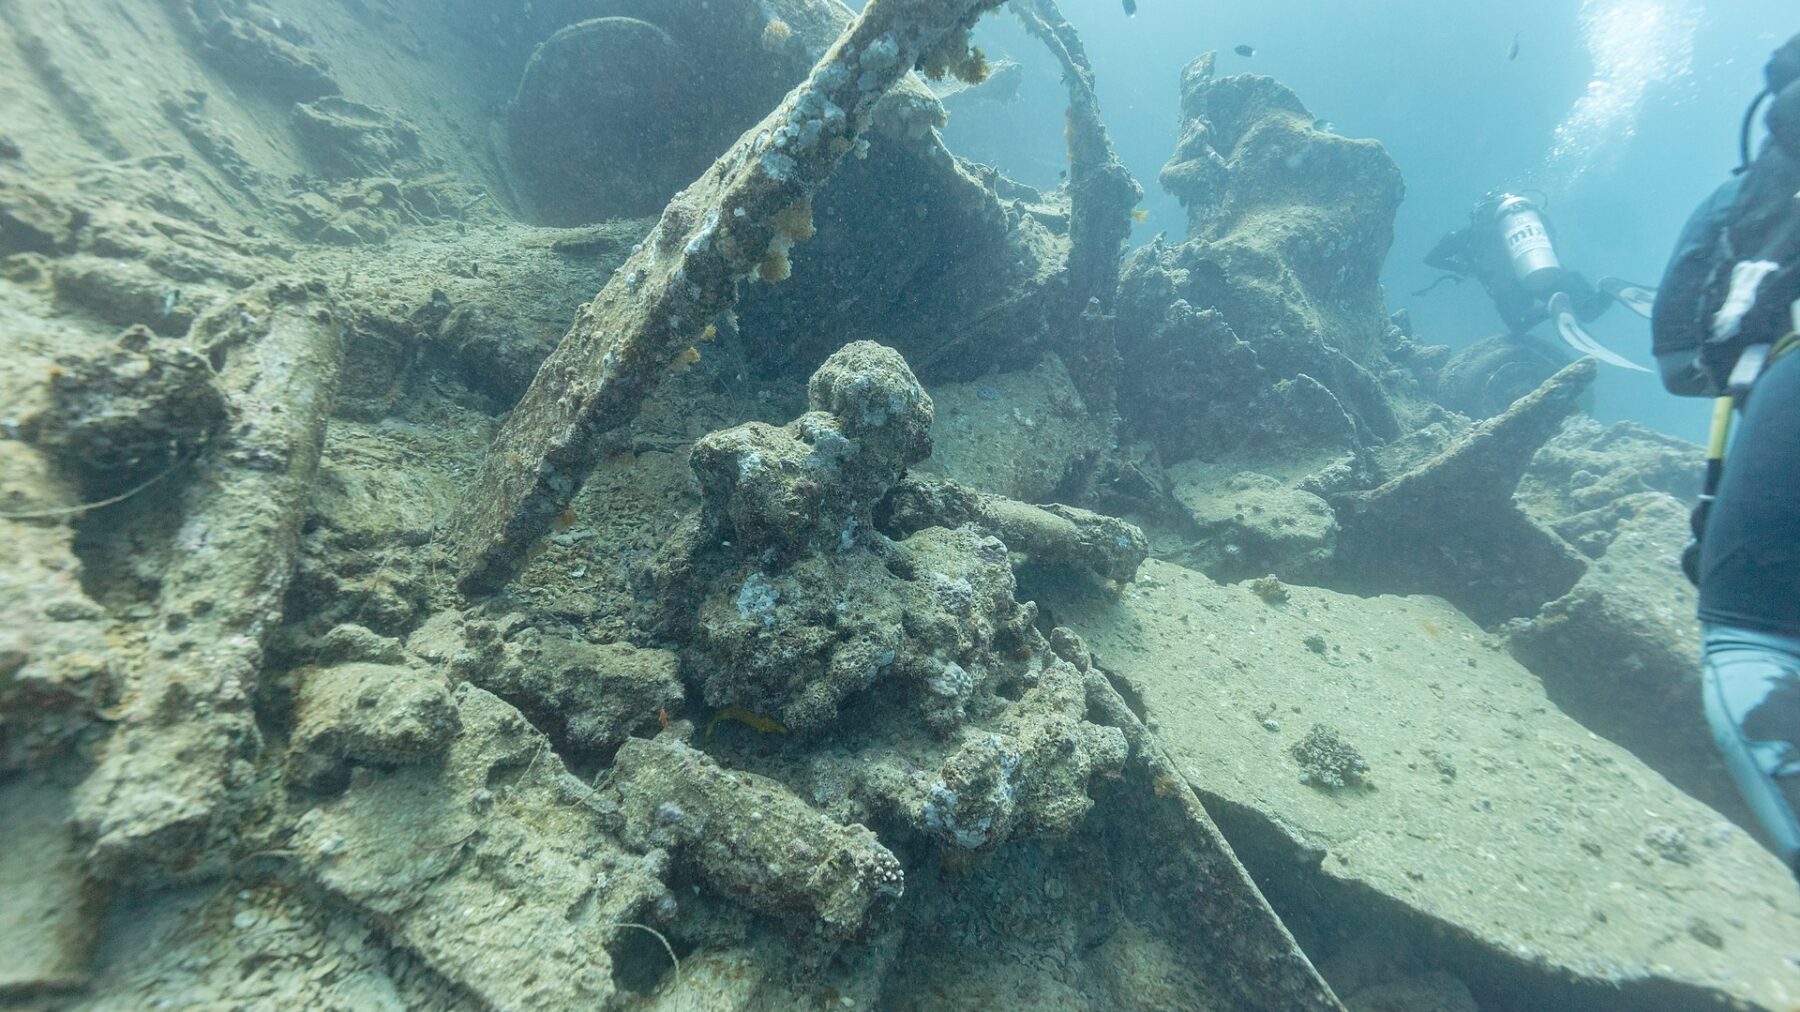
Use This Wreck Guide With The Trip Logistics Page
This guide is the canonical answer for divers searching dive the SS Thistlegorm, SS Thistlegorm diving, or a practical Thistlegorm diving trip. Start with the wreck plan, then make the logistics decision: day boat, liveaboard, or northern Red Sea itinerary. Pair this guide with the SS Thistlegorm day trip vs liveaboard comparison so the wreck plan and the travel plan match each other.
Before booking, confirm the operator’s guide ratio, planned route through the wreck, current expectations, gas and reserve rules, mooring or entry plan, and whether the itinerary leaves enough rest before and after the dive. For broader boat-based planning, use the PADI liveaboard diving plan as a booking checklist.
If you are searching how to dive the SS Thistlegorm, start with the real planning question: can this wreck be dived with enough recent experience, gas margin, route discipline, and respect for the site? The Thistlegorm is famous, but it is still a deep, busy Red Sea wreck where access format, current, visibility, crowding, and interior decisions can change the dive quickly.
This complete SS Thistlegorm diving guide is for certified divers planning with a qualified local operator or liveaboard crew. Use it after you have chosen the access format in SS Thistlegorm Day Trip vs Liveaboard. It does not replace training, a site briefing, a dive computer, local conditions, or the most conservative decision made on the boat.
For most recreational divers, the strongest plan is still a two-dive structure: one exterior orientation that makes the ship readable, then one conservative cargo-focused route only if conditions, guide ratio, visibility, training, and gas all support it. Trying to see every motorcycle, truck, gun, locomotive, and hold in one rushed dive is the fastest way to make a world-class wreck feel small and stressful.
Watch An SS Thistlegorm Wreck Dive First
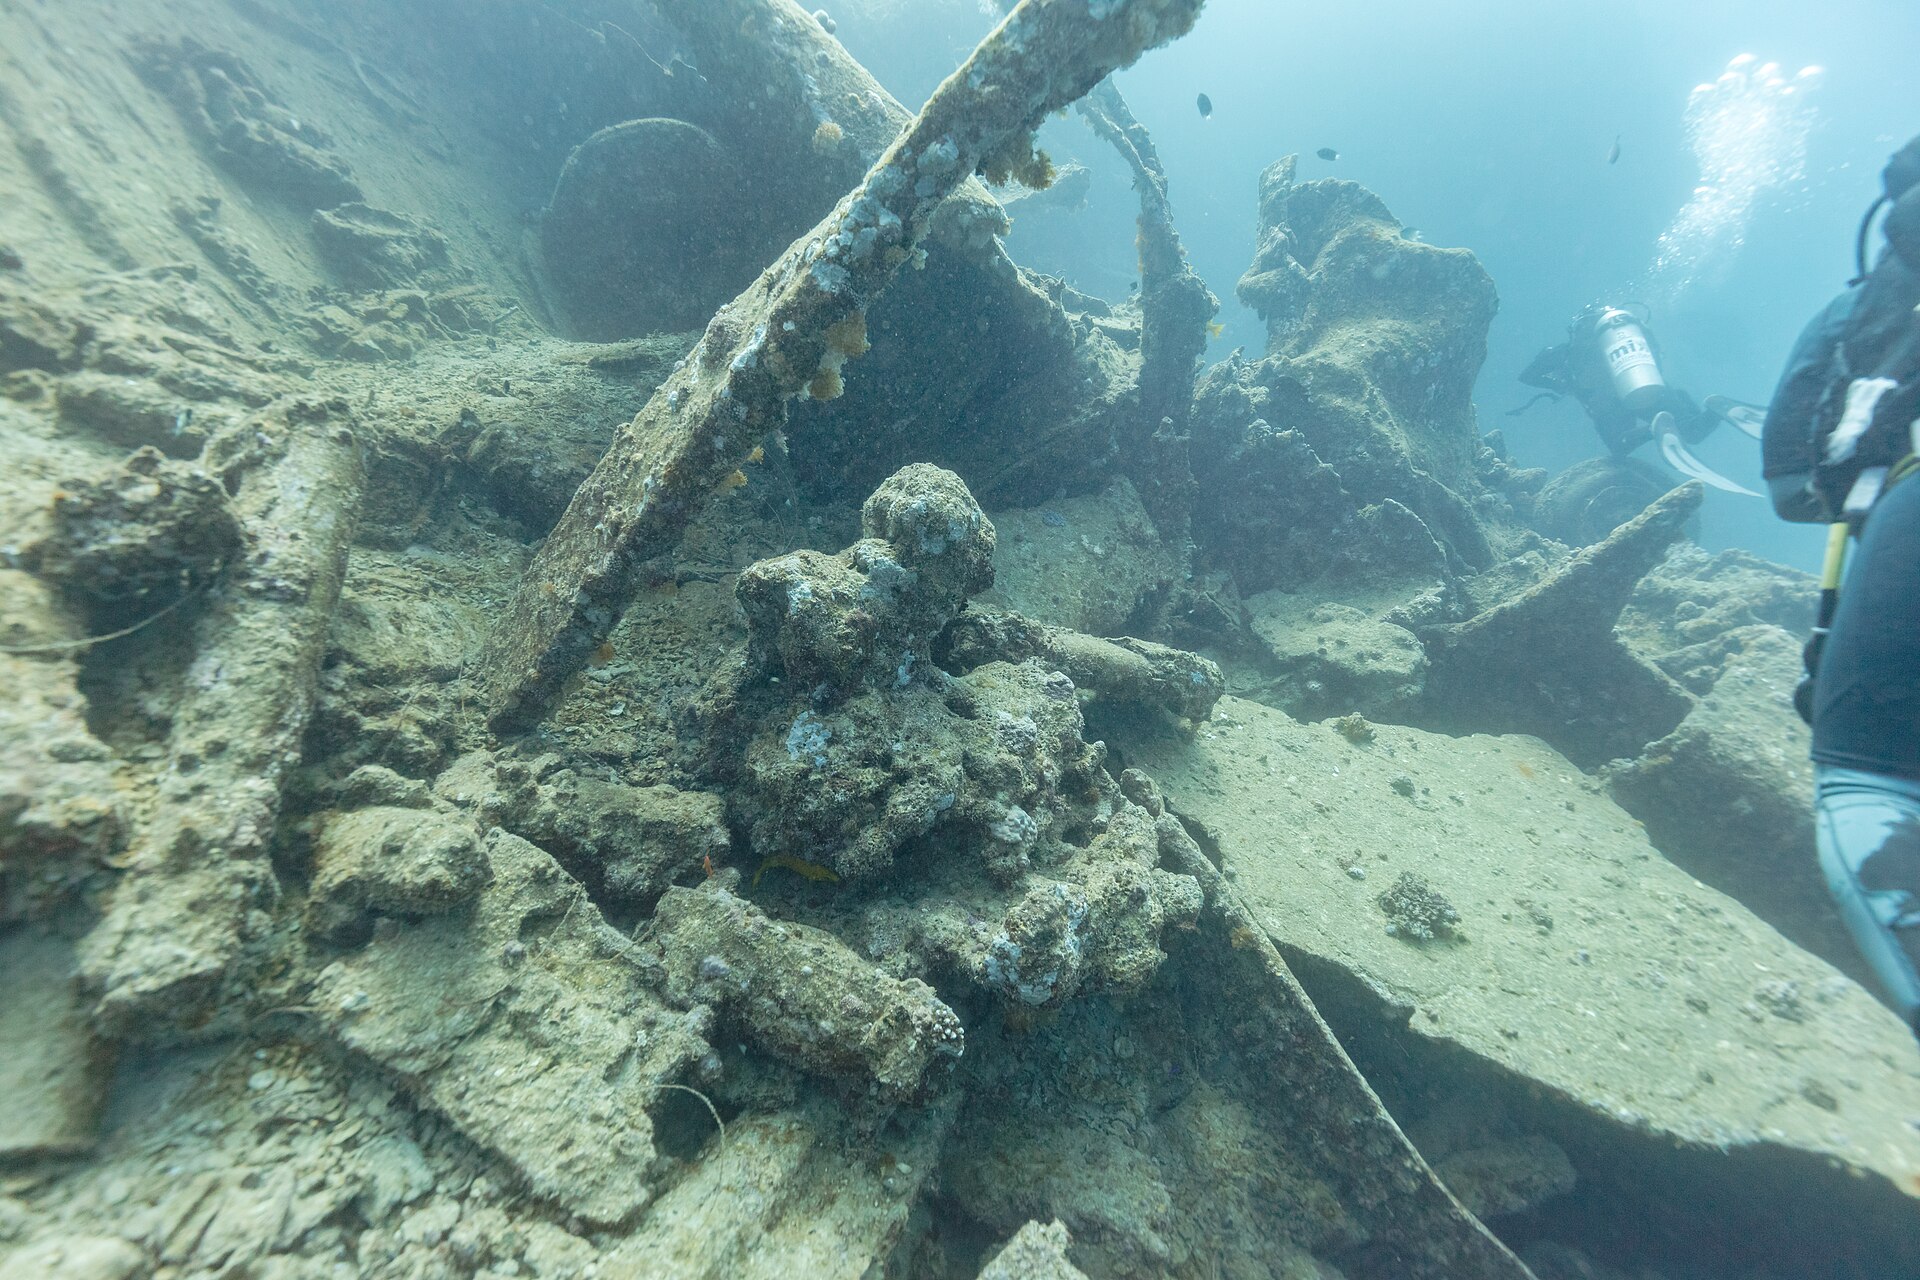
Before turning the wreck into a checklist of cargo holds and photo subjects, watch a real SS Thistlegorm dive slowly. The video gives visual context for the scale of the wreck, the blue-water approach, diver spacing, and why route discipline matters. Use it for orientation, then rely on the day’s qualified local briefing for current, visibility, depth, entry, exit, and wreck limits.
Use The Booking Checklist Before Paying
Once the wreck itself feels like a fit, move back to the travel decision before paying. The SS Thistlegorm day trip vs liveaboard comparison helps choose the route, and the SS Thistlegorm booking questions checklist turns that choice into operator questions about timing, guide ratio, backup sites, skipped dives, and cargo-hold limits.
Dive The SS Thistlegorm With A Real Wreck Plan
The SS Thistlegorm was a British armed merchant freighter built in 1940 and sunk in October 1941 while carrying wartime cargo through the Red Sea. Modern dive references usually describe the vessel as roughly 125 to 126 meters long. PADI lists the SS Thistlegorm dive site at a maximum depth of 32 meters, and a 2025 photogrammetry study describes the wreck as upright in about 32 meters of water, with the wheelhouse rising much shallower.
That depth range is why the wreck feels accessible to many experienced recreational divers, but it is also why the dive can shrink quickly. If the team drops straight to the sand, spends too long near the stern, or treats the cargo holds as an unlimited maze, the dive becomes short, busy, and gas-hungry before anyone has really understood the ship.
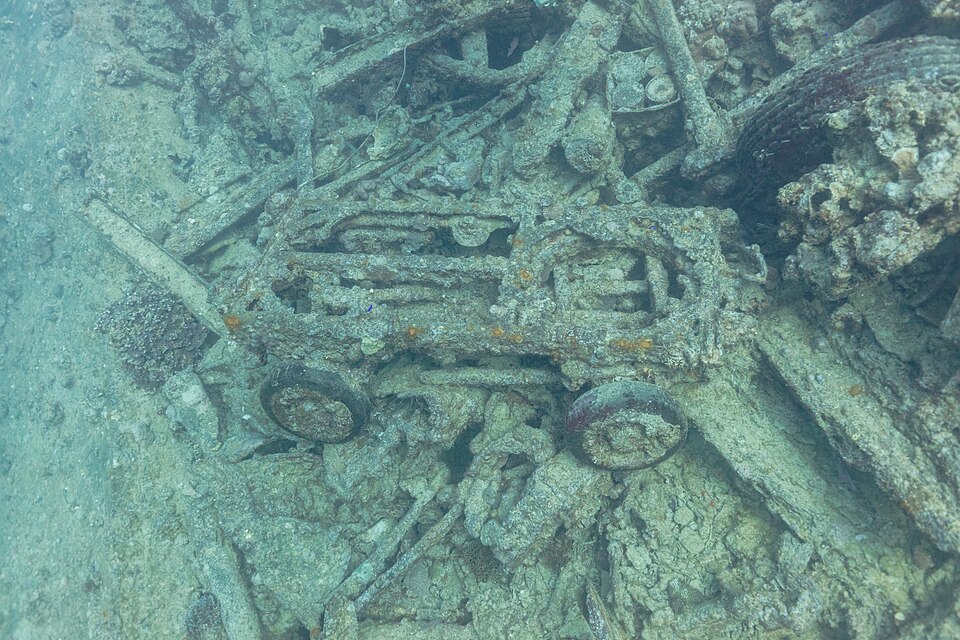
The cargo is the reason the wreck has become a Red Sea pilgrimage. PADI describes boots and motorcycles in Hold No. 1, trucks and armoured vehicles in Hold No. 2, plus locomotives displaced away from the main structure. The practical planning point is simple: you will not see everything well in one dive, and trying to do so usually makes the day worse.
The wreck is also an artificial reef and a heritage site under pressure. A 2023 PLOS One citizen-science study of the SS Thistlegorm marine community reported observations of 71 of 72 monitored target taxa over eight years. The later MDPI photogrammetry study of SS Thistlegorm change documented structural deterioration, artefact displacement, and the impact of intensive diving, mooring, and removal of objects.
That combination should change how you behave underwater. The right dive is not a race to touch history. It is a slow, no-touch route through a ship that is both alive with marine growth and being worn down by the very attention that made it famous.
Depth Bands That Shape The Whole Dive
Planning the Thistlegorm as one depth is the first planning mistake. The site changes by band. The upper structure and wheelhouse area can settle the team and save gas. The deck and cargo hold entrances create the main story. The stern, propeller area, blast zone, locomotives, and debris field can push the profile toward the deeper end of normal recreational limits.
| Depth band | What it usually means on the dive | Planning consequence |
|---|---|---|
| Surface to 12 meters | Descent line, ascent line, boat traffic awareness, final team checks, current assessment. | Stay on the line when current or traffic makes free movement messy; do not arrive on the wreck already scattered. |
| 12 to 18 meters | Upper structure, wheelhouse area, shallower deck features, orientation, easier photography. | Use this zone to slow breathing, confirm the team, and finish the dive if gas, comfort, or visibility is falling. |
| 18 to 26 meters | Main deck, cargo hold access, bridge approaches, vehicles, motorcycles, winches, and guide-led route decisions. | This is the core sightseeing zone for many divers; watch depth creep and agree on a clear exit signal. |
| 26 to 32 meters | Stern, blast area, sand, propeller views, debris field edges, and some locomotive remains. | Time and gas move fast here; visit only if conditions, certification, team comfort, and computer limits support it. |
A common good plan is to use the first dive for exterior orientation and deeper landmarks, then use the second dive for a calmer cargo-hold route with a stricter exit plan. A liveaboard may offer an early morning or night dive, but extra dives should have a purpose. A tired third look inside a crowded wreck is not automatically better than two clear dives you can actually remember.
Air Planning Before The Descent Line
The Thistlegorm is a bad place to discover that your normal warm-water gas use does not apply in current, at depth, with a camera, after a long boat ride, beside other teams, or near an overhead environment. DAN identifies running out of breathing gas as a major dive incident trigger, and its air-safety guidance stresses monitoring remaining pressure and planning the dive around available gas.
Use a simple worked example before the briefing. A 12-liter cylinder filled to 200 bar contains about 2400 liters of gas. At 30 meters, ambient pressure is roughly four times surface pressure, so a relaxed surface breathing rate of 15 liters per minute can become about 60 liters per minute before stress, current, task loading, or sharing gas is considered. That does not give a casual 40-minute bottom time. It means the first half of the cylinder can disappear in about 20 minutes if the diver stays deep, and the plan still needs ascent gas, reserve gas, buddy contingencies, and the operator rule.
For a recreational single-cylinder Thistlegorm dive, discuss gas at four points: pressure after descent, pressure before the deepest section, pressure when leaving the deepest or overhead-adjacent section, and pressure at the start of ascent. If current is running on the line, if someone is cold or anxious, if cameras are slowing the group, or if visibility inside the holds starts to deteriorate, the turn point should move earlier.
This is also where “guided” can become a dangerous word if the diver stops thinking. A guide can set a route, but your pressure gauge, computer, comfort, and buddy awareness still matter. If your consumption says the route is too ambitious, your gauge wins. A good operator will respect that signal rather than make you feel like you are spoiling the dive.
Thistlegorm Two-Dive Planning Matrix
Use this matrix as a briefing tool, not as a dive plan to copy. It assumes a guided, no-decompression recreational plan, a dive computer, a single cylinder, and conservative surface reserve. Your tank size, SAC rate, nitrox mix, certification, temperature, current, fatigue, and operator policy can change every number.
| Segment | Depth and time conversation | Gas and exit decision | Reason for this segment |
|---|---|---|---|
| Dive 1: descent and orientation | Descend on the line, settle the team, and orient around the upper structure before chasing the stern. | If equalising, current, buoyancy, or post-descent pressure is poor, simplify immediately. | The first five minutes decide whether the dive will be calm or reactive. |
| Dive 1: exterior landmarks | Move from bow and deck features toward bridge, blast area, and stern only if conditions support it. | Leave the deeper zone on the first low-gas, computer, current, or comfort signal. | The dramatic exterior is best seen with margin, not while negotiating underwater. |
| Dive 1: shallow finish and ascent | Return to upper structure and line up the ascent before the team is low or tired. | Start ascent planning while reserve is still real, not theoretical. | A controlled finish protects the second dive and avoids surfacing away from the boat. |
| Dive 2: hold entrance decision | Decide before entering which holds are planned, whether ambient light remains visible, and where the exits are. | If silt, crowding, current, or spacing looks poor, make it an exterior or deck-detail dive. | The best cargo dive is deliberate; the worst one is a dark queue with cameras. |
| Dive 2: cargo route | Move slowly through Hold No. 1 and Hold No. 2 only as far as the guide, conditions, and team margin allow. | Exit on planned pressure, first silt problem, first separation risk, or first guide signal. | The cargo is memorable because you can recognise it, not because you rushed every room. |
| Dive 2: deck finish | Use remaining time for winches, deck details, marine life, and a clean ascent path. | Do not spend final margin on one more interior detour. | A good second dive ends with control, not with a scramble back to the line. |
The weak/default choice is to ask, “Will we see the motorcycles?” The better choice is to ask, “At what pressure and visibility do we leave the holds, and what exterior route do we use if the interior is crowded?” That one question turns a famous-object dive into a managed wreck dive.
Itinerary One: The Exterior Wreck That Makes The Ship Readable
The first dive should make the ship readable. Descend on the line, pause long enough to confirm the team, then orient around the bow, deck, bridge area, and upper structure instead of dropping straight to the sand. This buys time to feel the current, settle breathing, sort cameras and lights, and decide whether the deeper stern section makes sense today.
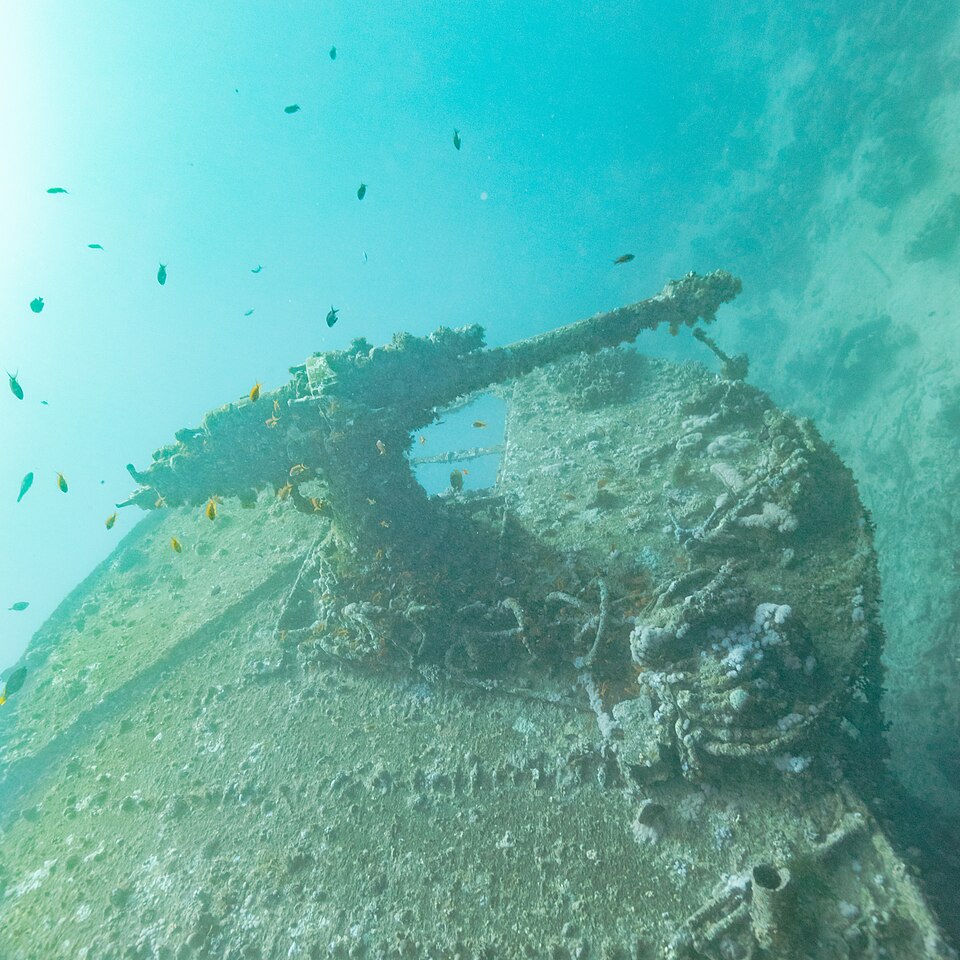
From there, a classic exterior route moves along the deck toward the bridge area, then toward the blast damage and stern guns if conditions permit. This is where depth discipline matters. The stern is photogenic, but it can turn a relaxed wreck dive into a short deep dive if the team lingers too long.
Example: a diver with Advanced Open Water certification and 70 logged dives may still be rusty after six dry months. On paper, the depth is allowed. In practice, the better first dive is a conservative exterior orientation with no hold entry, a strict deep-section time limit, and a guide who is comfortable skipping the sand if current or breathing rate is higher than expected.
Finish the first dive by moving shallower before ascent. That final pass over upper structure is not wasted time. It gives the team a quieter zone to regain control, photograph deck details, check pressure, and line up with the ascent route without fighting to leave from the deepest part of the wreck.
Itinerary Two: Cargo Holds Without Chasing Every Room
The cargo-hold dive is the one many divers imagine first, and it is also the route most likely to blur the boundary between a guided swim-through and a true overhead environment. The right version feels calm and deliberate. The wrong version feels like a dark hallway where the diver with the largest camera controls the pace.
Before entering, ask exactly which holds are planned, whether the route stays in ambient light, what the exit points are, what the turn pressure is, and what the guide does if another team is already inside. Ask this on the boat, not while hovering at the hatch.
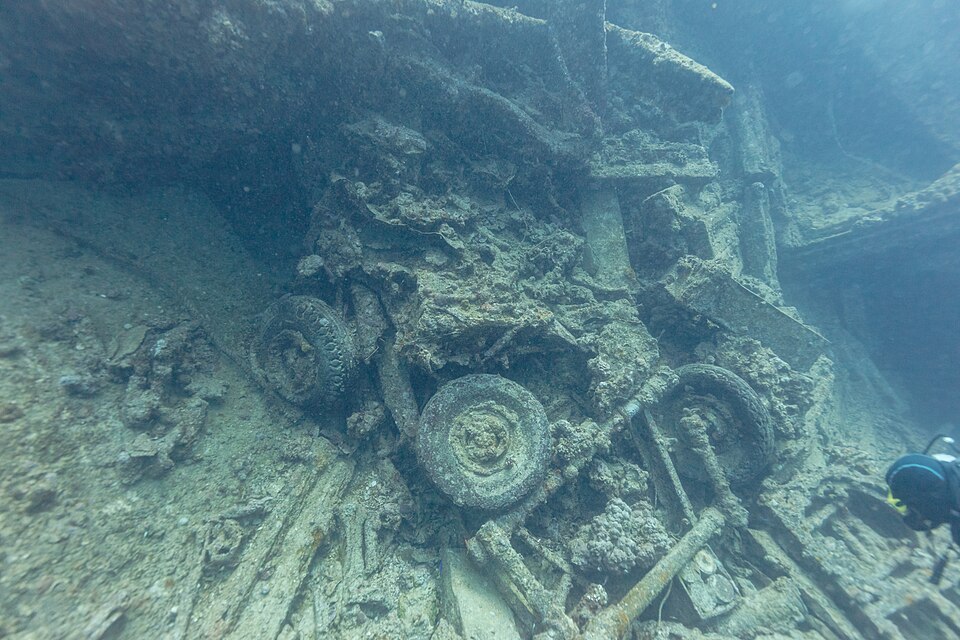
Hold No. 1 and Hold No. 2 are the usual stars: motorcycles, trucks, boots, and wartime cargo that make the wreck feel suspended in time. Stay horizontal, keep fins clear of silt, avoid dangling gauges and cameras, and never push through another team for a better frame. If your buoyancy is not quiet enough for the space, the exterior of the wreck is still a world-class dive.
DAN is direct about the risk change: wreck interiors create overhead, disorientation, silt, entanglement, and sharp-structure hazards, and penetration requires appropriate training, equipment, and gas planning. If your training is open-water only, stay with the conservative guided route and avoid side rooms, restrictions, or anything that would require a line, redundant gas, or a trained wreck team.
Example: a photographer who usually has excellent buoyancy may still be a poor fit for a hold route if the camera rig is bulky, the group is large, and the diver needs both hands to frame every shot. The better plan is to choose two cargo subjects, keep the rig clipped tight between shots, and leave before the camera starts driving the route.
Photo Tour: Cargo, Locomotives, And Details Worth Slowing Down For
The Thistlegorm rewards slow looking. A rushed dive turns it into a checklist: motorcycle, truck, gun, locomotive, done. A better dive treats each object as part of the ship story and wartime cargo. Ask the guide before the dive which cargo features are likely on the planned route so you can recognise them underwater instead of trying to identify everything later from shaky video.
The motorcycles and trucks are iconic because they still read as ordinary machines interrupted in transit. Boots, rifles, aircraft parts, and ammunition make the cargo feel less like a wreck attraction and more like a frozen logistical moment. That is also why no-touch discipline matters. A hand on a vehicle, a fin in silt, or a camera placed on cargo is not harmless just because thousands of divers have already visited.
The locomotives are easy to misunderstand because the explosion scattered major parts away from the neat deck-cargo story. The MDPI photogrammetry study mapped a debris field far beyond the main wreck and documented heavy components displaced from their original positions. A recreational itinerary should not chase the whole debris field. It should help you understand why the visible pieces sit where they do.
For photography, choose one setup you can control without losing buoyancy. Wide angle, a small calm team, and patient positioning usually beat an overbuilt rig inside a crowded hold. Let faster teams pass, keep lights away from other divers eyes, and wait for bubbles or silt to clear instead of forcing the next shot.
Access From Sharm, Hurghada, Or A Northern Liveaboard
The Thistlegorm is commonly reached by long day boat from Sharm el-Sheikh, by longer-range trips from Hurghada, or as part of northern Red Sea liveaboard itineraries. DIVE Magazine notes Sharm, Hurghada, and northern liveaboard access and describes the site as one where many operators expect Advanced Open Water level and a meaningful recent-dive base. Treat that as the beginning of the fit conversation, not a guarantee.
A day boat can work if the operator is honest about departure time, crossing time, expected sea state, likely number of boats, and whether two dives are planned. The tradeoff is fatigue and schedule pressure: an early start, long crossing, current, and crowded moorings can make the second dive feel less calm than the sales page suggests.
A liveaboard can make the wreck feel more spacious because it may arrive early, stay close, and offer more than one route. The tradeoff is cumulative fatigue. A diver on day four of a packed itinerary may not be the same diver who looked confident on the booking form. If the itinerary offers a night dive or third dive on the wreck, ask what it adds and what it costs in alertness.
Example: if you are choosing between a cheaper day boat and a liveaboard, do not compare only price. Compare sleep, crossing time, guide ratio, number of planned dives, cylinder options, nitrox process, mooring discipline, and what happens if too many boats are already on site. The safer value is often the operator who has a clear backup plan.
Responsible Wreck Etiquette On A Site Under Pressure
The Thistlegorm is not only busy; it is documented as vulnerable. HEPCA describes conservation and mooring interventions on the SS Thistlegorm, including efforts to reduce damage from vessel mooring. The Thistlegorm Project also describes damage from intensive tourism, mooring strain, looting, and diver contact.
Responsible etiquette is not a decorative add-on here. Do not touch cargo, collect objects, tie into the wreck, place cameras on artefacts, wedge fins into openings, exhale deliberately under fragile overheads, or treat a guide route as permission to explore independently. If you see a loose object, leave it. If another team is inside a hold, wait or choose another route.
The no-touch rule also protects your dive. Contact with metal, wires, edges, silt, or unstable surfaces creates risk for the diver as well as for the wreck. Good trim, tidy hoses, controlled finning, and patience are not advanced aesthetic preferences on Thistlegorm; they are basic site manners.
What To Ask The Operator Before You Pay
A serious Thistlegorm operator should be able to answer specific questions without making you feel awkward for asking. Which certification and recent-experience standard do they use? How many dives are planned on the wreck? What is the expected maximum depth for each route? Do they separate exterior-only divers from cargo-hold divers? What is the guide ratio? What pressure or gas rule turns the dive? What reserve do they expect on the boat? What happens if current is strong, visibility drops, or too many boats are already on the wreck?
Ask about equipment in plain language. A computer, torch, SMB, audible signalling device, and suitable exposure protection are ordinary expectations for a serious Red Sea wreck day, but the operator requirement matters. If nitrox is available, ask who analyzes cylinders, how maximum operating depth is checked, and whether the planned route is actually designed around no-decompression limits. Nitrox can help with no-decompression time when used correctly; it does not fix poor gas planning, poor buoyancy, current, crowding, or lack of wreck training.
Ask how they protect the wreck. Do they use installed moorings correctly? Do guides brief no-touch rules clearly? Do they prevent souvenir-taking and unsafe penetration? A cheaper boat that treats the Thistlegorm as an underwater amusement ride is not a bargain. It is asking you to spend a once-in-a-lifetime dive inside the wrong risk culture.
Use Dive Nomadic’s broader planning guides alongside this one: ask the practical booking questions in Questions To Ask A Dive Operator Before Booking A Trip, sanity-check operator fit with How To Choose A Dive Operator For Your First Dive Trip, and use How To Plan Dive Travel Around Seasons, Visibility, And Water Temperature for the broader Red Sea timing decision.
Thistlegorm Questions Divers Actually Need Answered
Is SS Thistlegorm suitable for Open Water divers? For many divers, no. The issue is not only the card; it is the combination of depth, possible current, boat traffic, overhead temptation, and task loading. Some operators may make conservative choices for less-experienced divers, but this is commonly treated as an advanced or experienced-diver site. Recent dives, buoyancy, gas awareness, comfort in current, and the operator route matter more than the plastic in your wallet.
Can you dive Thistlegorm on air? Yes, many recreational divers do, but air does not remove the need to manage no-decompression time and gas carefully at 26 to 32 meters. Nitrox may be useful when properly analyzed and planned within its maximum operating depth, but the mix does not make a rushed or poorly supervised wreck route sensible.
Is wreck penetration required? No. The exterior alone is worth the trip. If the hold route is not right for your training, confidence, gas, buoyancy, camera setup, or the day’s visibility, choose an exterior dive and enjoy one of the world’s great wrecks without pretending every doorway is an invitation.
How many dives should you plan? Two is the sensible baseline: one exterior orientation and one conservative cargo-focused route if conditions allow. More can be excellent on a liveaboard, but each extra dive should have a purpose: a dawn exterior, a specific cargo route, a photo pass, or a gentler upper-structure dive. Extra dives should not become repetition while tired.
Build The Rest Of The Red Sea Plan Around The Wreck
The Thistlegorm can be the highlight of a northern Red Sea trip, but it should not be the only thing the itinerary gets right. Give yourself a warm-up dive before the wreck if you have been out of the water. Pack personal gear that protects comfort and fit, using Carry-On Dive Gear Packing Checklist For Dive Travel as a starting point. Leave room in the schedule for weather and boat changes. Plan a gentler day after the wreck if the itinerary has been intense.
The best Thistlegorm divers are not the ones who see every object. They are the ones who surface with gas, control, memory, and respect intact. If you can name your route, depth bands, gas checkpoints, exit points, photo priorities, and no-touch commitments before you descend, the wreck has a chance to become what it should be: not a trophy dive, but a precise encounter with history still sitting in blue water.